Posts tagged ‘SSL Configuration’
HTTPS (SSL) Configuration : in Tomcat / Jetty / Jboss
In my earlier days of development, whenever i see “https:// ” in my webbrowser, i think its a rocket science to create one such connection in my own app.
But after some years, when i am started digging, its showing me that it is as simple as it is. I am going to share the basics of SSL & its configurations in the servers.
When you start implementing HTTPS, the first question will be
what we need to do in my application to support “Https”?
There is nothing to change in our application to support “HTTPS”. But the container we are deploying(i mean server like tomcat, jboss, etc.,) need to support HTTPS i.e., we need to enable the ssl configuration in the servers.
Before starting the configuration in the servers directly, lets know the basic of SSL
Lets take a day to day example, when we enter into the office, we have to swipe our access cards to open the door. Think our access card is a certificate(for encryption) to make the communication between us and our office in a secured way. This is called SSL. Now look at the below definition
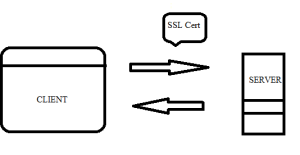
Secure Socket Layer is a secured(encrypted) communication between web browsers and web servers.
The above pic gives the basic idea about the SSL. Now lets Configure the SSL
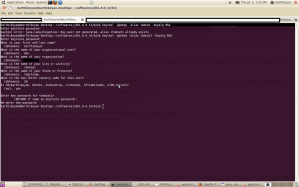
For SSL to Operate, we need a certificate. The certificate can be generated by built-in java tool “keytool”.
for Windows: %JAVA_HOME%\bin\keytool -genkey -alias tomcat -keyalg RSA
for Unix: $JAVA_HOME/bin/keytool -genkey -alias tomcat -keyalg RSA
while executing these commands, it will prompt for the below info’s.
The default location of the certificate is ur home directory. If you want to change it, then you can modify the path by introducing “-keystore /path/to/my/keystore”.
HTTPS enable in Tomcat :
Now the final step is to configure our tomcat with the certificate for SSL. Uncomment the following lines in the “%TOMCAT_HOME/conf/server.xml”
<Connector port=”8443″ protocol=”HTTP/1.1″ SSLEnabled=”true”
maxThreads=”150″ scheme=”https” secure=”true”
clientAuth=”false” sslProtocol=”TLS” />
The above line contains the default SSL using JSSE with keystore path as ur “home path”, & password as “changeit”. If we have generated the certificate using someother path or password, then we have to change the above to
<Connector port=”8443″ protocol=”HTTP/1.1″ SSLEnabled=”true” keystoreFile=”${custompath}/.keystore” keystorePass=”123456″
maxThreads=”150″ scheme=”https” secure=”true”
clientAuth=”false” sslProtocol=”TLS” />
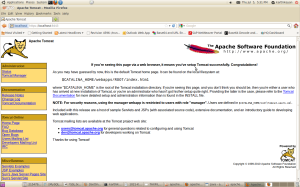
Now start your tomcat, and try to access in the port “8443”[we can change this] ,”https://localhost:8443/”. Now our SSL configuration is done. we can put our Helloworld application and access it with “https://”
Enable Https ( SSL) – Jetty Server:
we can generate the certificate with alias “jetty” and configure that for Jetty by adding the following config in “${jetty_home}/etc/jetty.xml”.
<!– Add this connector code in jetty.xml –>
<Call name=”addConnector”>
<Arg>
<Newcolor: rgb(0, 0, 0); font-family: arial; font-size: small; line-height: normal; “>server.ssl.SslSelectChannelConnector”>
<Arg><Ref id=”sslContextFactory” /></Arg>
<Set name=”Port”>8443</Set>
<Set name=”maxIdleTime”>30000</Set>
<Set name=”Acceptors”>2</Set>
<Set name=”AcceptQueueSize”>100</Set>
</New>
</Arg>
</Call>
<!– Passwords and keystore location we are specifying –>
<New id=”sslContextFactory”>
<Set name=”KeyStore”>/home/karthikeyan/.keystore</Set>
<Set name=”KeyStorePassword”>123456</Set>
<Set name=”KeyManagerPassword”>123456</Set>
<Set name=”TrustStore”>/home/karthikeyan/.keystore</Set>
<Set name=”TrustStorePassword”>123456</Set>
</New>
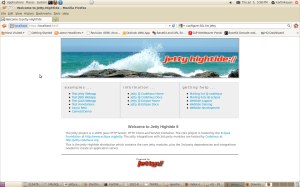
Now start the jetty server. Try with “https://localhost:8443/”.
Enable Https ( SSL) – JBoss Server:
For configuring SSL in Jboss, its as similar as tomcat. Change the “${Path}/jboss-4.2.2.GA/server/default/deploy/jboss-web.deployer/server.xml” , by uncommenting the line and adding the keystorepath & keystorepass
<Connector port=”8443″ protocol=”HTTP/1.1″ SSLEnabled=”true” keystoreFile=”${custompath}/.keystore” keystorePass=”123456″
maxThreads=”150″ scheme=”https” secure=”true”
clientAuth=”false” sslProtocol=”TLS” />
Start the Jboss, and access it in HTTPS://
Now we have access our application with “HTTP” as well as “HTTPS”.
We can also see our created certificate in the browser as shown below.
In my next blog, we will see how to create a http and https client using java.


